How to use Squarespace tags and categories to organize your site
New to Squarespace? You can sign up for a free trial of here! Oh, and I also got ya a little off the price, use code PAIGE10 for 10% off your first year. (Yes, that's an affiliate link!)
Prefer to watch?
HERE’S THAT VIDEO FOR YA!
Prefer to watch?
HERE’S THAT VIDEO FOR YA!
Depending on your business, you can have a lotttt of things going on on just one website (blog, shop, podcast, portfolio, etc) and after a while, things can start to get a little chaotic!
The last thing you want is to confuse or overwhelm visitors or potential customers with your virtual clutter, which is why Squarespace makes it super simple to organize certain content on your site through the use of categories and tags.
In this post, we are going to be chatting about the difference between categories and tags, where to be adding them, and how to use them to customize and declutter the appearance of your content.
But before we get started - here’s something you don’t wanna miss…

Still on Squarespace version 7.0? Check out Squarespace tags + categories: A complete guide, instead!
What is the difference between categories & tags?
Think of categories as the broad or general topics you cover on your site, and the tags as the more specific keywords you would use to talk about that topic.
It’s best practice to keep your categories to a minimum, say 3-5. But when it comes to those tags or keywords we mentioned? Go crazy, girlfriend!
Say for instance you are a food blogger. Your categories might be breakfast, lunch, dinner, snacks, and drinks.
If someone is visiting your blog and looking for a keto recipe to use up that chicken in their fridge, they probably don’t want to have to sift through every last dinner recipe on your blog in order to find it.
This is where tags come in! You could have a tag for different types of ingredients to make it easy for people to find recipes that use them, and possibly recipe types such as vegan, keto, dairy-free, gluten-free etc.
You might even have tags for things like “Ready in 20” or “dinner for 2.” Basically, anything that helps the reader to quickly narrow down their search and find only the posts that are relevant to them!
This isn’t just for your site visitors, btw. Tags and categories are also a way to let Google know what your content is about and which search results to include your content in!
Now there’s a saying in marketing that confusion kills conversion - and that couldn’t be truer than on your site friend… sooo, as well as using tags n categories to get things organized, make sure to grab this FREE training on how to double your site sales in 4 simple steps to learn the other best practices ya need to know!
Now back to the tags n categories…
Where & how to add categories & tags in squarespace
Things you can (and should) be tagging in Squarespace version 7.1:
blog posts
products
events
How you tag and categorize them looks pretty much exactly the same for all three, but let’s use blog posts as an example.

To add tags or categories to a blog post:
head into your blog collection page under pages
find the post you want and click the 3 dots to the right of the title
Choose settings from the list
You’ll find the option to categorize and tag your post under the options tab of your settings window!
When you start typing existing tags or categories should auto populate. If you’re creating a new one, just type it in and hit enter to save it. If you want to delete a tag, just hover over it and click the cross icon. To delete a category click the check box on the right of it and then select delete at the bottom of the list.
But heads up! Tags are case sensitive, so however you are typing your keyword, make sure you are doing it the same way every time if you want Squarespace to be able to find it later. (Def learned this the hard way once…)


Want to change the name of a tag or category after the fact without having to retag or categorize every last blog post?
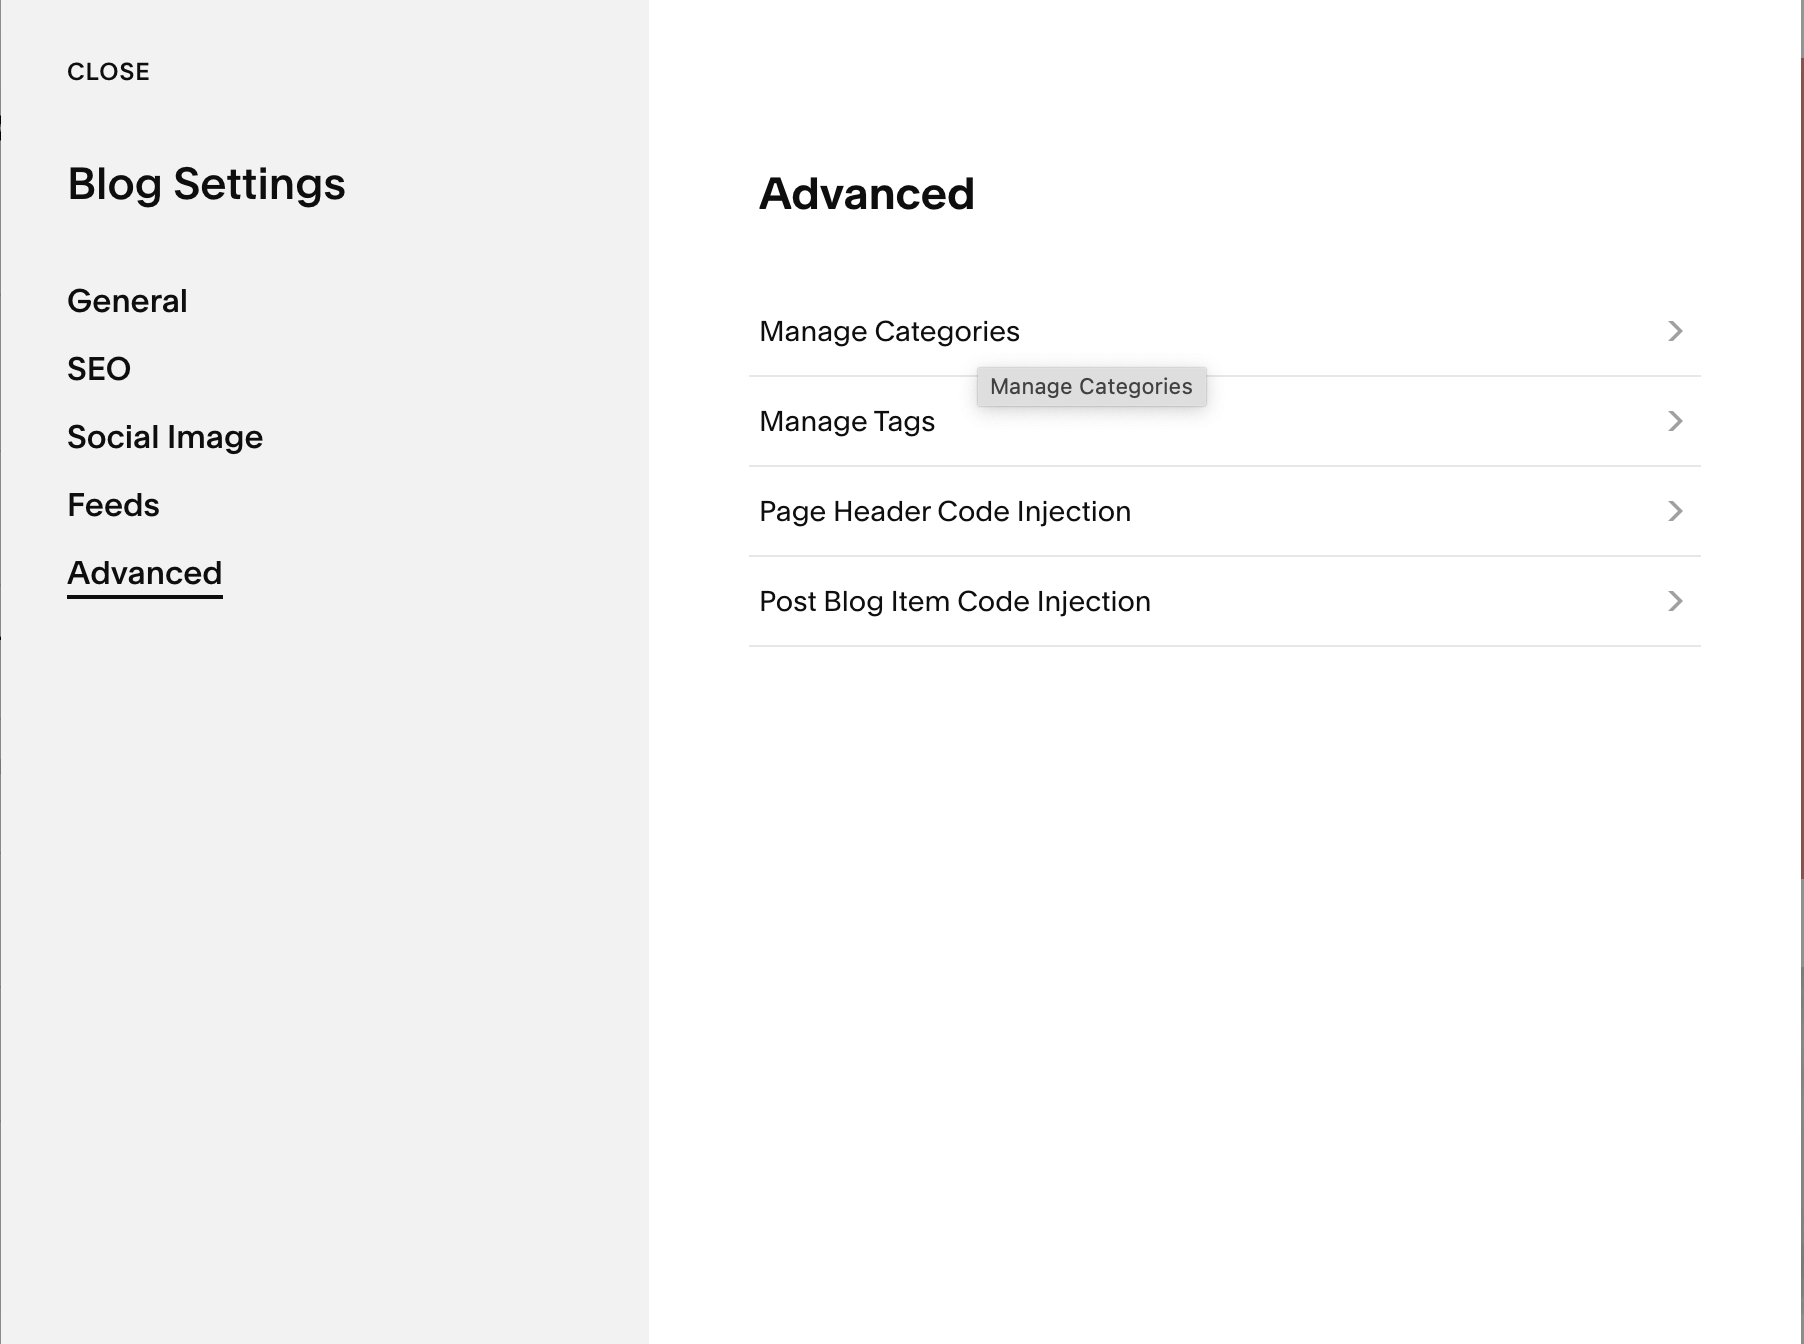
Click the gear icon appearing on your blog collection page panel (to the left of your blog page).
Click advanced > manage categories and select the name of the category you wish to edit. Tags are edited in the same way, except you would click manage tags instead.

The changes made here will be collection wide, meaning it will only affect items in that collection (read: if you are editing your blog tags, you will only affect blog posts, but not products with the same tag).

How to use Squarespace tags and categories to organize your site
to display specific content on a page
Using my food blogger example again, say I want to pull allll the dinner recipes I’ve ever posted on to one page, but maybe I want to have different sections on the page for for chicken, beef, fish, or meatless dishes.
To do this I would create a new page, add a blank section, and then drop in a summary block (whichever summary block layout your heart desires as you can change it later if needed).
Under the contents tab (the thing that tells Squarespace where to be pulling content from) select your blog or store if you want to pull products from the list.


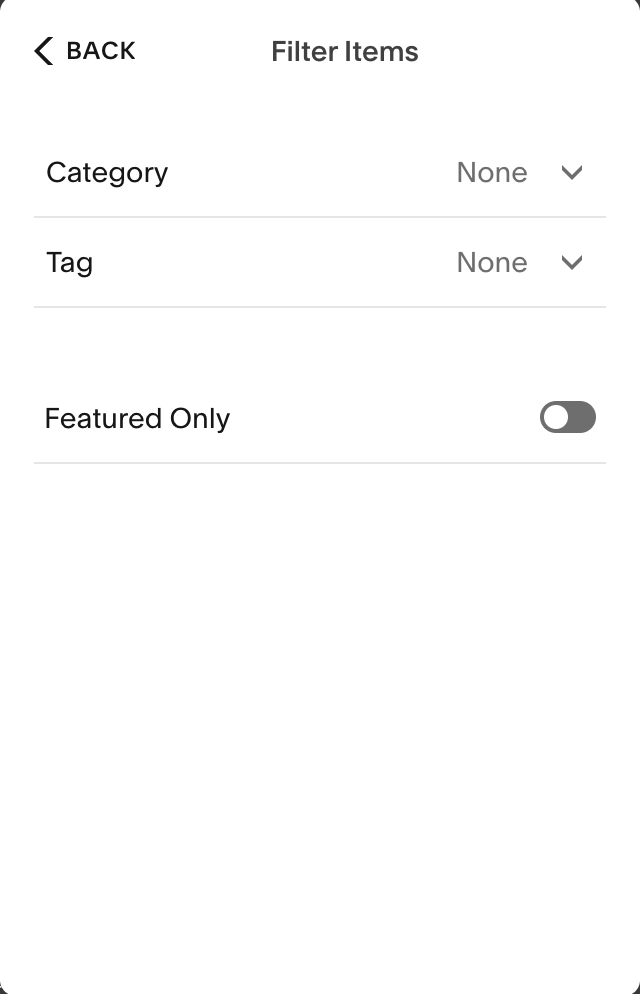
Next, you will head to filter items at the bottom of the content tab.
Enter in your preferred category and/or tag. Squarespace now knows only to show posts with those exact filters.
You can use the rest of the settings under the design tab to customize the layout and style of your summary block.
P.S. Getting content to appear in your summary block only works ONCE you've created that thing. So first write a post, tag or categorize it, THEN add your summary block and tell it to pull the content of that tag or category. If you don’t yet have any posts tagged or categorized in that specific way yet, nothing will appear in the summary block.
to organize & improve your main site navigation
It’s best practice to keep the items in your site’s main navigation to a minimum. (ie. about, blog, shop, contact), but you still want to make it easy on visitors to quickly get to where they want to go!
Together with folders, tags and categories can be used to create handy little drop downs or secondary navigation menus for each page in your main navigation that only appear when you hover over them.
Here’s an example of what that looks like:

To do this, you go to your pages panel, click the plus sign you would use to add a new page, choose folder and call it “blog” (or whatever title you want appearing in your main navigation).
Anything that you drag into this folder will now appear in your drop-down menu for your blog. This includes links, which are a fabulous way to link to content from a specific category without having to create a whole new page.

So if you want your breakfast category to appear in your blog drop down menu, you would:
click the plus sign under your folder to add a new page
select link instead of page
name your link breakfast (or whatever you want appearing in the drop-down menu)
click the gear icon beside the link field to open up your options
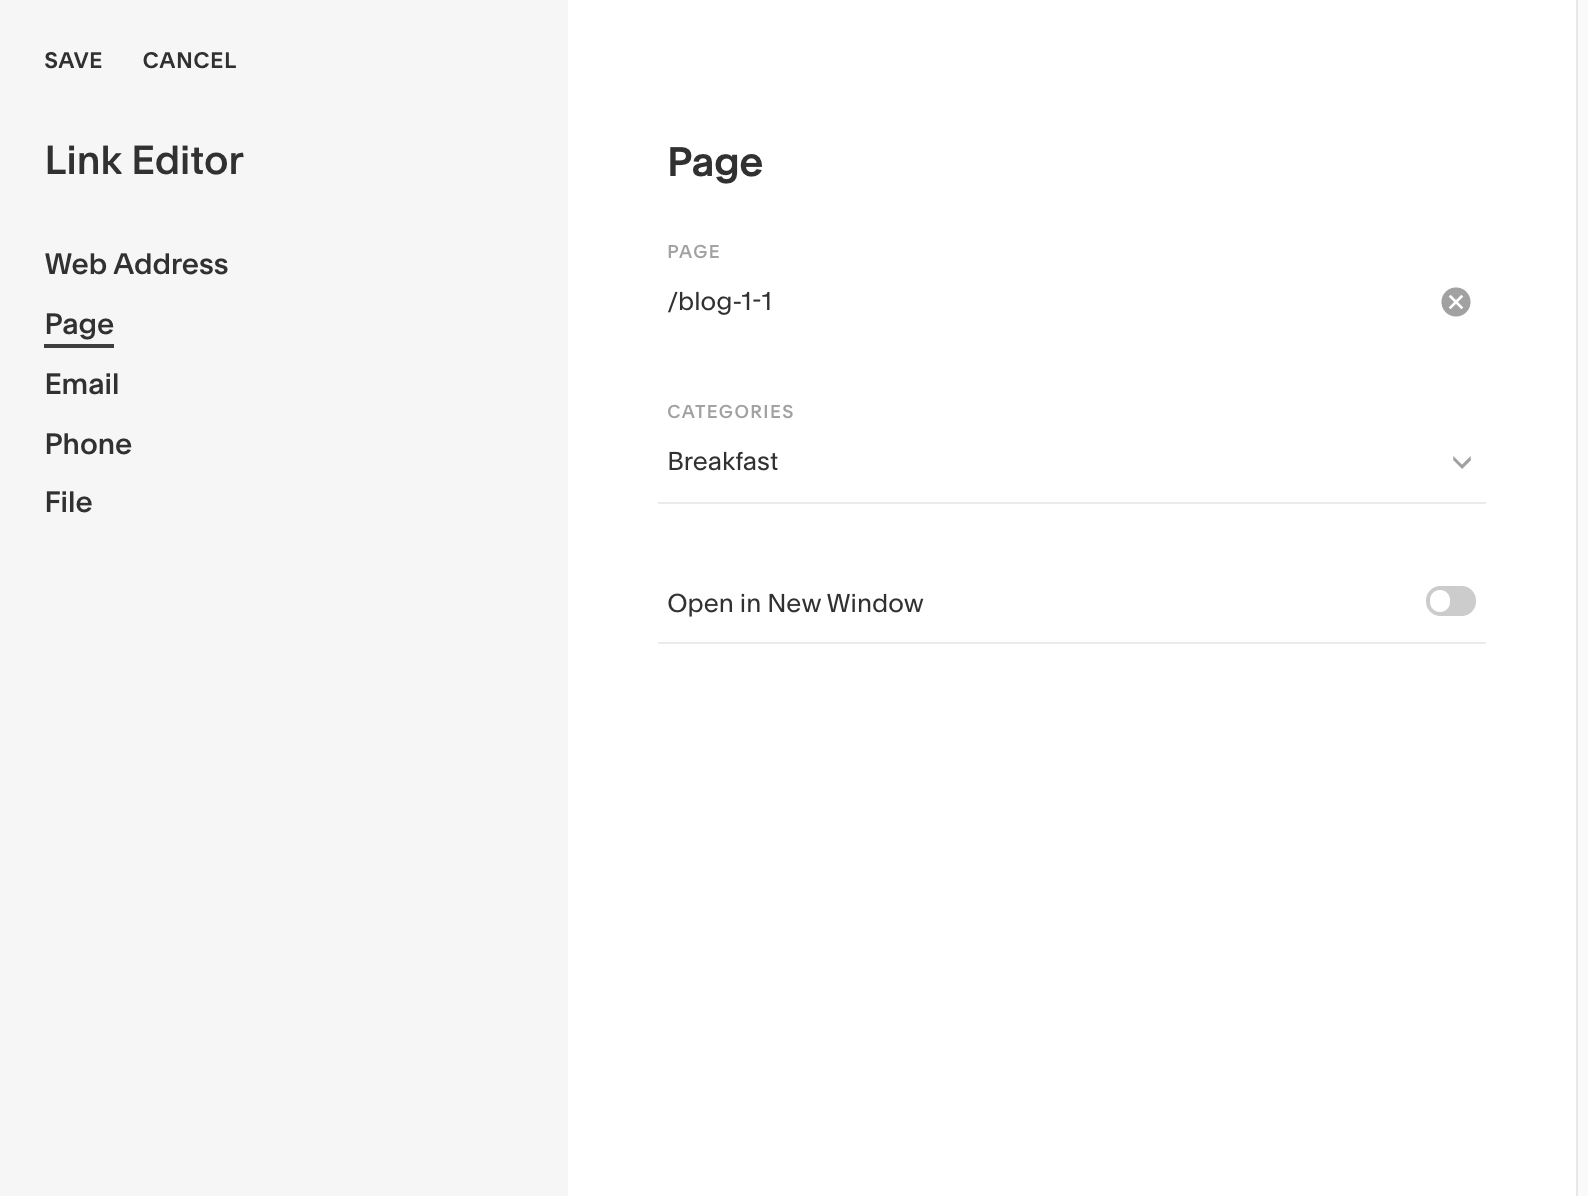
Next:
go to Page
start typing in the name your blog and select it when it auto-populates
select the category you wish to link to
press save
Now, when someone hovers over blog in your main navigation and selects “breakfast” from the drop down, they will be taken to a page showing only posts categorized as breakfast.
But if you don’t love the way Squarespace automatically pulls your relevant content when you create this link, then creating a page as we did above is handy.
to completely redesign your blog or other collection pages
When you add a collection to your site (ie. blog, shop, etc.) Squarespace throws in a page to help you display your content from that collection. Not in love with the layout they give you? Wish you had more options for customizing the appearance of your shop page?
Categories & tags to the rescue!
Check out how I used categories, tags, and summary blocks (as well as a few other blocks) to completely redesign the layout in: How to completely redesign your Squarespace blog page.
Even though this post is specifically about the redesign of my blog page, the tips you learn can be applied to any type of collection that allows you to add tags and categories!
Need a little (or a lot) more hand-holding when it comes to customizing your site?
Check out my course, Squares Secrets! The most popular, advanced & comprehensive online course teaching you how to build a Squarespace site that attracts your ideal clients & customers 24/7!