

Squarespace Courses Tutorial for Beginners - Start to Finish
Prefer to watch?
Here’s tHAT VIDEO FOR YA!
Mentioned in the Video
10% off Squarespace with code PAIGE10
*Yep those are affiliate links & codes - my margarita fund thanks you kindly if you choose to use them!
Squarespace recently released their newest feature, Courses and I am so thrilled by it. So let's not waste any time and get straight into how to use it in this beginner's tutorial for Squarespace Courses.
Now, before we get started, creating a course is one thing, but figuring out if it will sell is quite another. Wondering if your course idea has six-figure potential - take this quick quiz to find out!

Okay, firstly, let's start off with a question which I know is going to come up, and that is, can I create a course on any Squarespace template?
Yes, you can create a course on any Squarespace template in Squarespace 7.1. If you're on a very, very old version of Squarespace that you started years ago (7.0 and before), then you won't be able to use this feature, but if you're started a website within the past, like let's say two years, you're gonna be on Squarespace 7.1, and yes, you can choose any template.
How to set up your Squarespace Course
So I'm just gonna pick a random template to start with. And from here, let's create a course.
So I'm gonna go under the website tab, and then I will add my course in the not-linked section.
That means it exists on the website, but it's just not in my top navigation for right now. So I'm gonna click the plus button, and I'm gonna select the “New Courses” option.

There are two example demo layouts to choose from… it doesn’t matter too much which you choose.

Once that’s selected you will see my course on bread making (the example demo content), has been created! And this brings you to the new courses panel.
How to add lessons and chapters to your Squarespace Course
Click on the course itself to open up the editor.
Start by clicking on course content.

That will bring up your lessons which are organized in chapters.
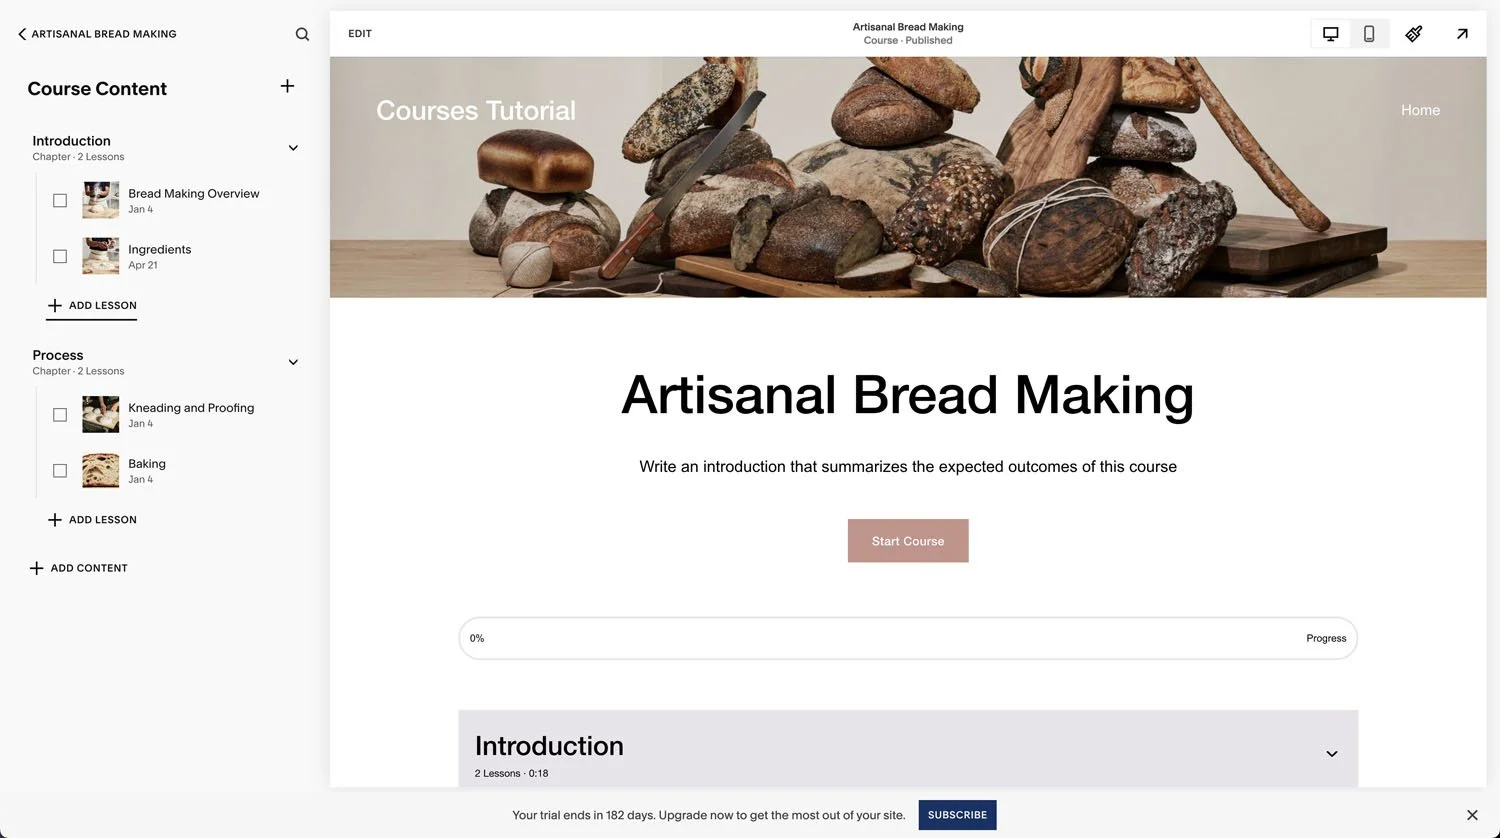
So if I click into one of these, we can see the example demo that exists right now. They have a little video, a little bit of information below, potentially some downloads, some photos.

When adding content, we have both chapters and lessons.
Chapters are like modules. So you have like an overarching theme, and then a bunch of smaller lessons within each chapter. So we can add our overarching chapters, and then lessons within each one.
How to add content to your lessons inside your Squarespace Course
To add content, start by adding a lesson.

You can then add a title, and an excerpt. (I find the excerpt is usually not needed as most people go straight into the content, but you can totes add one if your little heart desires!)
You can also clean up your url (although don’t worry too much about making this SEO friendly unless you plan to make your course freely available as it won’t be showing up on google anyway), and finally you can upload a thumbnail that’ll show up next to the lesson in your course overview.

Okay, so I have my basics for the lesson down.
Next, let's go to the video section and add a video to my Squarespace Course
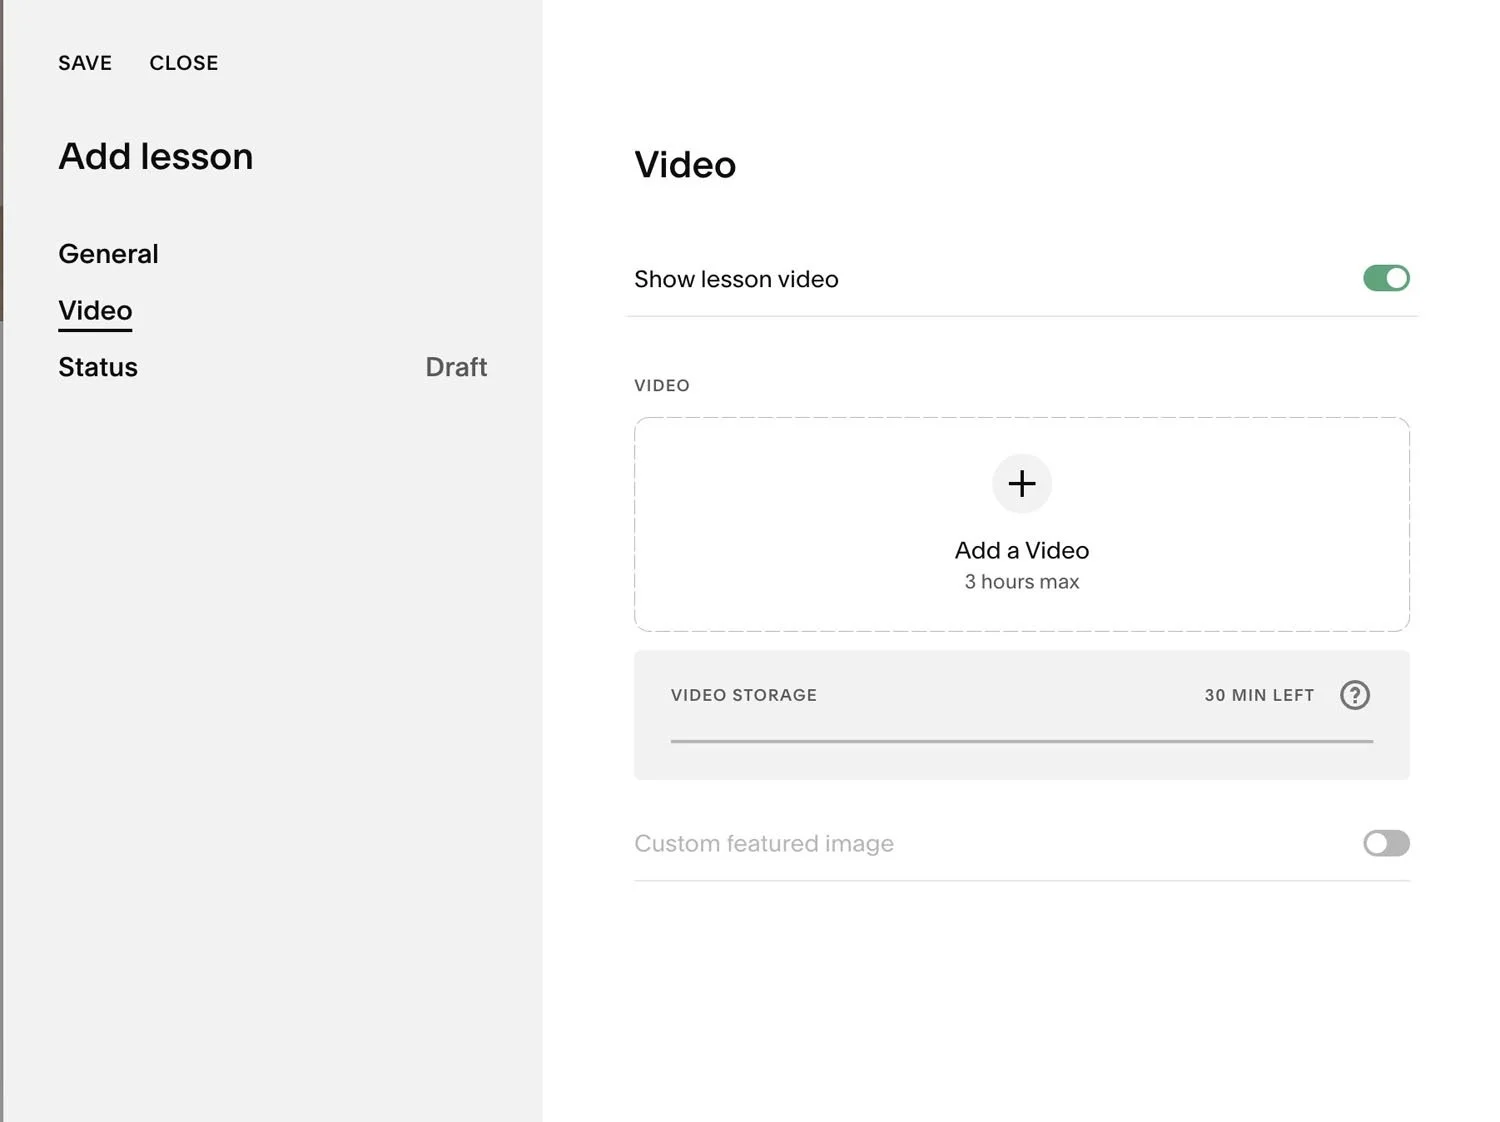
So the assumption and what most courses are built off of these days is video. So what we would do is we can go ahead and click the plus button and add our video. You can either choose to upload your own videos that you've recorded it, you've saved it to your desktop and then you select to upload the video.
Or alternatively, you can add it from a link.

So say for example, if you've uploaded your videos onto YouTube or Vimeo, for example, you can pull them in here. And the way you do that is you set them to be unlisted on YouTube or Vimeo so that no one publicly can find them except you've then pulled them into your course - this can save you a few pennies as externally hosted video doesn’t count toward your video allowance for your course.
Once you’ve added a video you’ll need to head to status. So automatically anything you create here will be in draft status.

If you want this to be published so it’s live, you would change it to “published”. You can also set a certain date for it to be published, and you also have the option of scheduling, which is setting a certain day and time for this content to be made public.
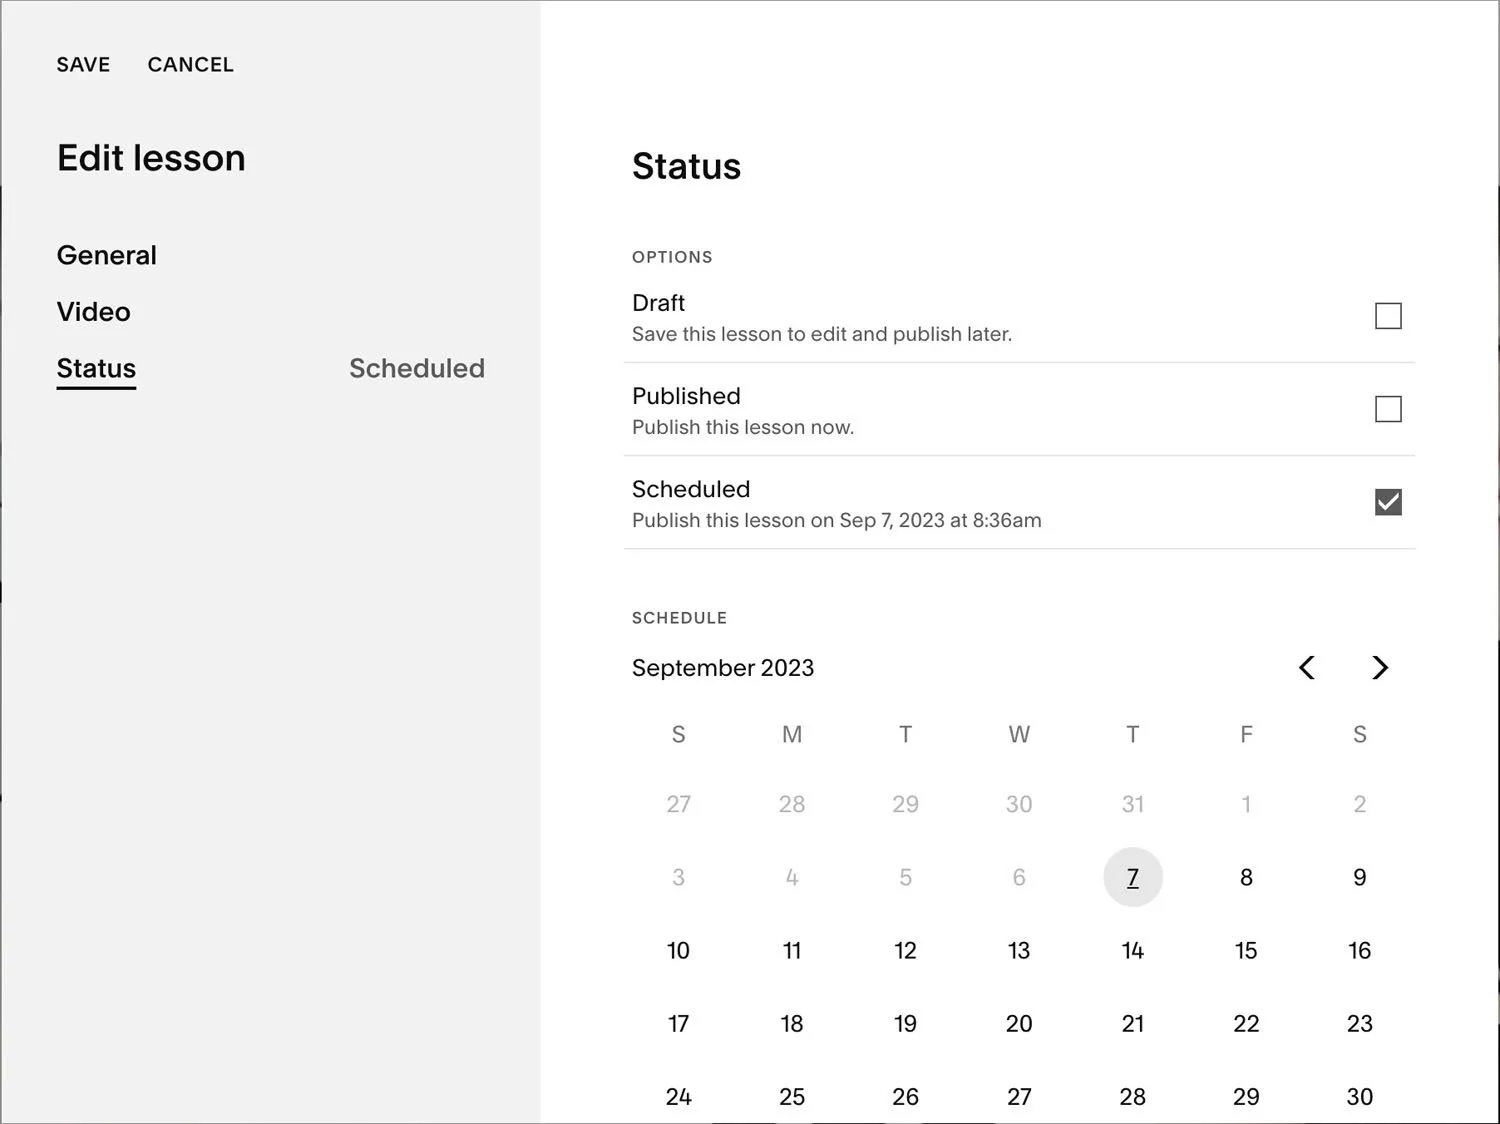
So if you want to drip your course content where you want every week for eight weeks, for example, on Monday the 28th, and then every single week after that new content becomes live, you can set each specific video to go live at certain dates and times.
And therefore you don't need to be sitting at your computer to manually change over things to get it to publish at the time that you want that content to drip which is pretty handy!
Pros and cons of using Youtube vs natively hosted video in your Squarespace course
Now you'll notice the one downside to linking to your video as opposed to uploading your video is that when you link to it, we get sort of the not-so-pretty looking bits and pieces from YouTube overlaid, which doesn't look as great as when we go into say the ones which were uploaded natively inside of Squarespace, which look a lot more beautiful, which is kind of the really big selling point of Squarespace. So uploading versus linking does have some benefits.


Adding other content to your Squarespace course
Now, what if you wanna add other content to your course other than just this one specific video? Maybe you have a PDF you want them to download or you want a little bit of an explainer or some text in there as well. How do we do that?
We would click on the edit button in the top left and then we could add a section.
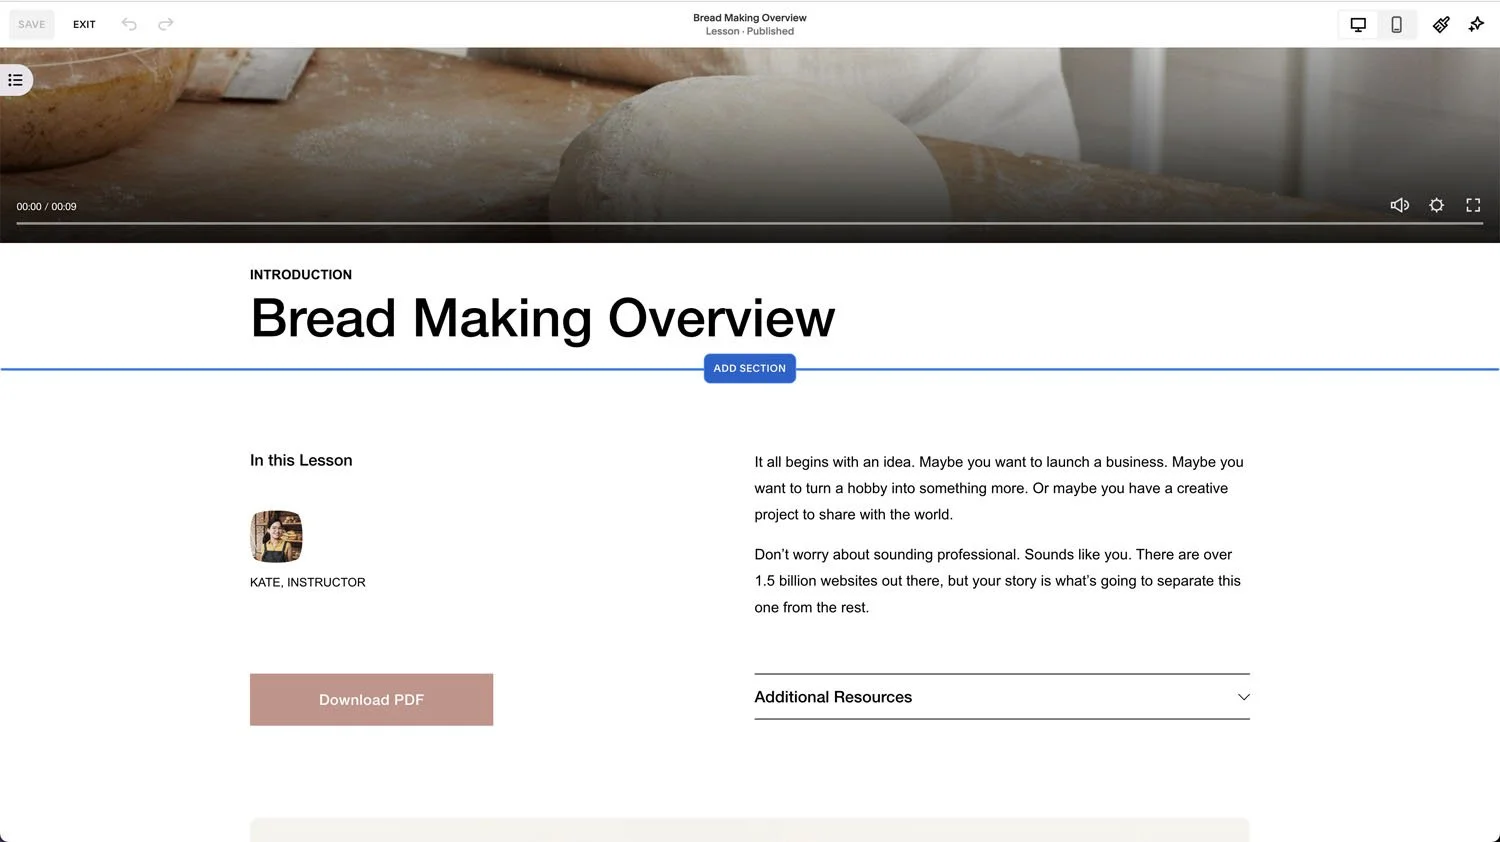
I'm gonna go for a blank section. And then you'll notice that when I click add block, we have all of the same block options that you would have anywhere else in the Squarespace platform.

You can add whatever your little heart desires to this lesson inside of your course.
So text buttons, more videos, galleries, images, forms, accordions, it's all there.
If you are new to Squarespace and you're not so familiar with all of these block options yet, I do have a Squarespace beginners tutorial to help you with the general aspects of the platform and how to use these different blocks and rearrange things on the page and everything you need to know!
How much does it cost to host a course on Squarespace?
Let's also quickly discuss the pricing plans for Squarespace courses. So it's called the digital products add-ons. When you have a Squarespace site, you pay for the add-on and then you can get courses on your website. Now you'll see all of the different plans have unlimited courses, membership, students, all of the things, insights, it's all very similar.
The prices below are correct as of Autumn 2023… check out Squarespace’s course pricing page to be sure of the pricing when you’re creating your course!

The only difference really is the amount of video storage and the transaction fees.
But remember, the video storage only applies to videos that you upload onto Squarespace. If however, you just link to your videos, which are say living on Vimeo or YouTube, then that doesn't count towards your video storage limit.
The other difference is the transaction fees.
I know when I created my first course committing to something for like $100 a month was very scary. And so I love that they've actually started off with plans that are super affordable.
The starter plan is $9 a month. The difference is that you will have a transaction fee. So that means that when someone buys your course, 7% of your course price will then go towards Squarespace and you will get the remaining percentage of the course income.
So then the question really becomes, when do I switch over and when is it worth me going for say the professional plan, which has 0% transaction fees versus say one of the starter plans.
The difference between $9 a month and $119 a month is $110 a month. So basically your course needs to be making at least $1,570 per month in order for it to be worth it for you to be spending basically the extra $110 to get to the professional plan.
So again, do feel free to start off at whatever level you want to, and know you can change later on.
If you already know that this course is going to be a smashing success out the gate, then you can go straight for the professional plan right away. Alternatively, if you're not so confident, you just want to test it first, you can go for the starter plan for $9 a month. You can deal with the 7% transaction fee for now. And once you get your course to the point where it's making over like $1,600 a month, that is when it would be worth your while and you'd actually be paying less overall if you switch over to the professional plan with 0% transaction fees.
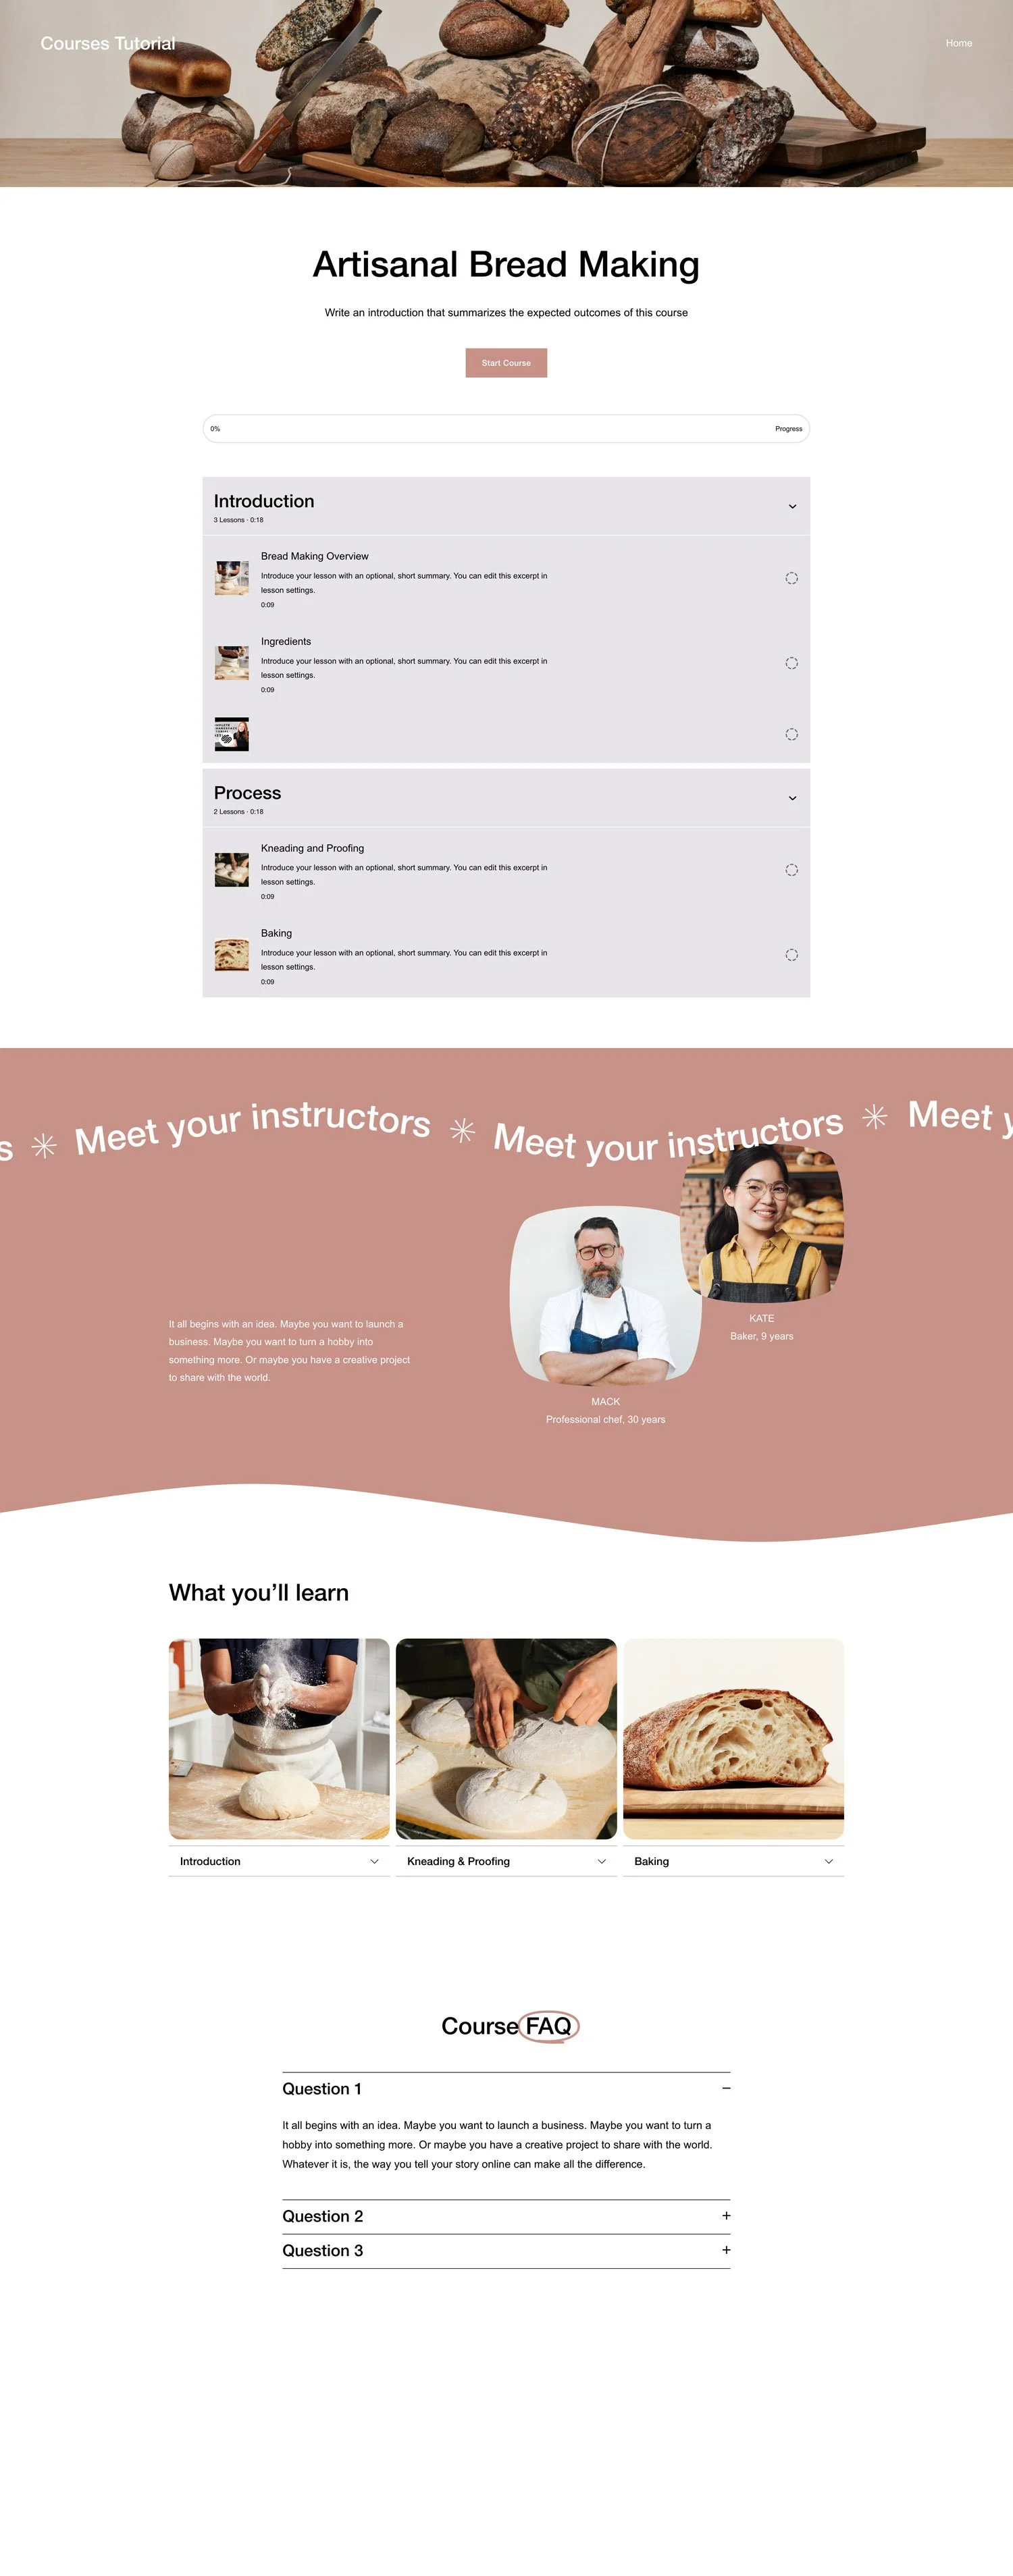
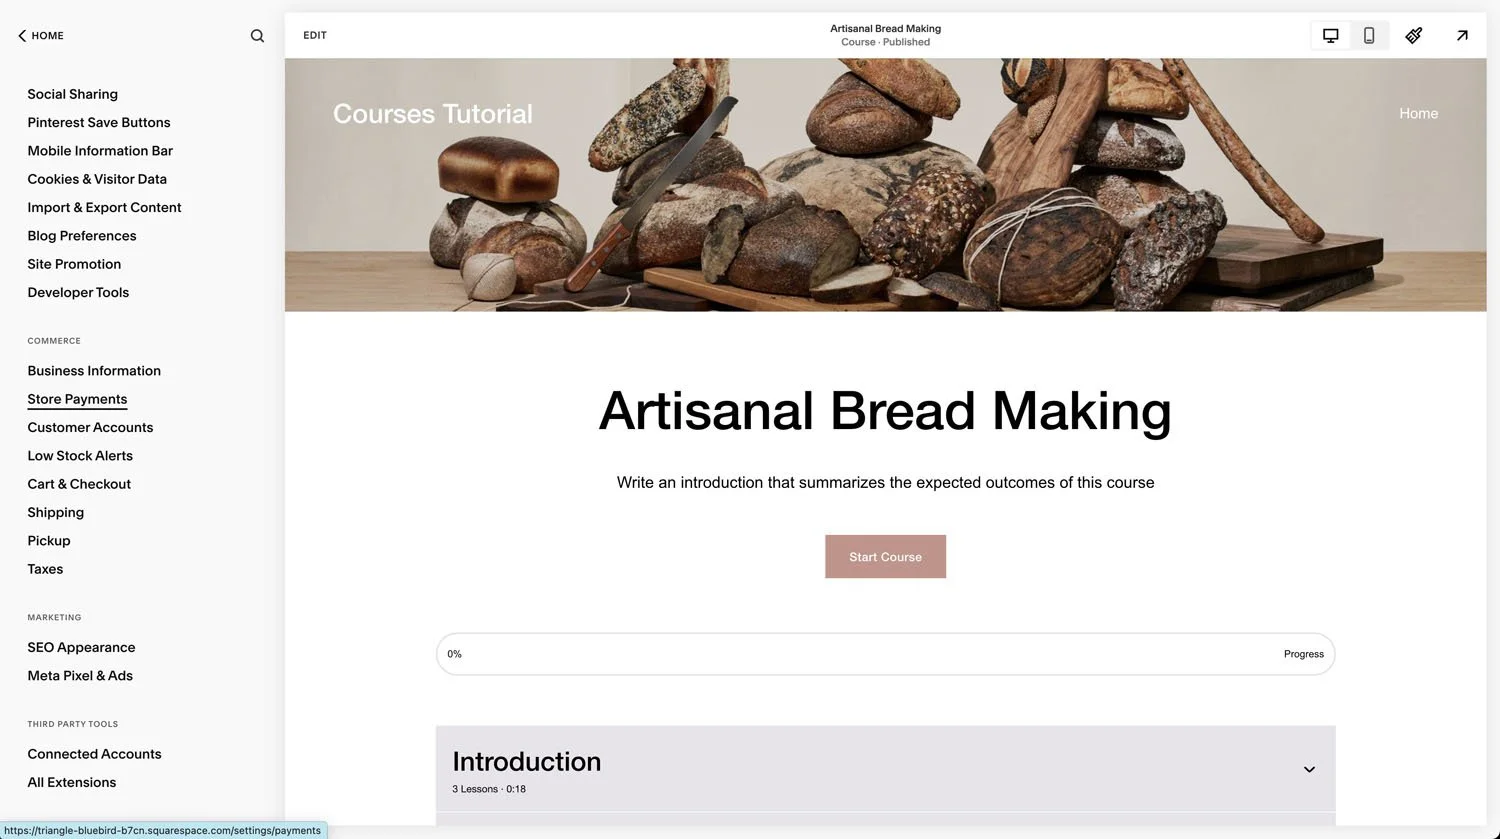
Next, let's talk about the Squarespace course overview page.
So this is basically when someone purchases your course, they will come into this page and it will give them sort of like the rough overview of all the content there. And then they can click in to start a specific section, they can jump forward if they want to jump forward, or they can click in to just get started wherever they were before.
Be sure to know that this isn’t a sales page - it’s the page that people in your course will see to navigate through the content once they’ve purchased. We’ll get to sales pages later!
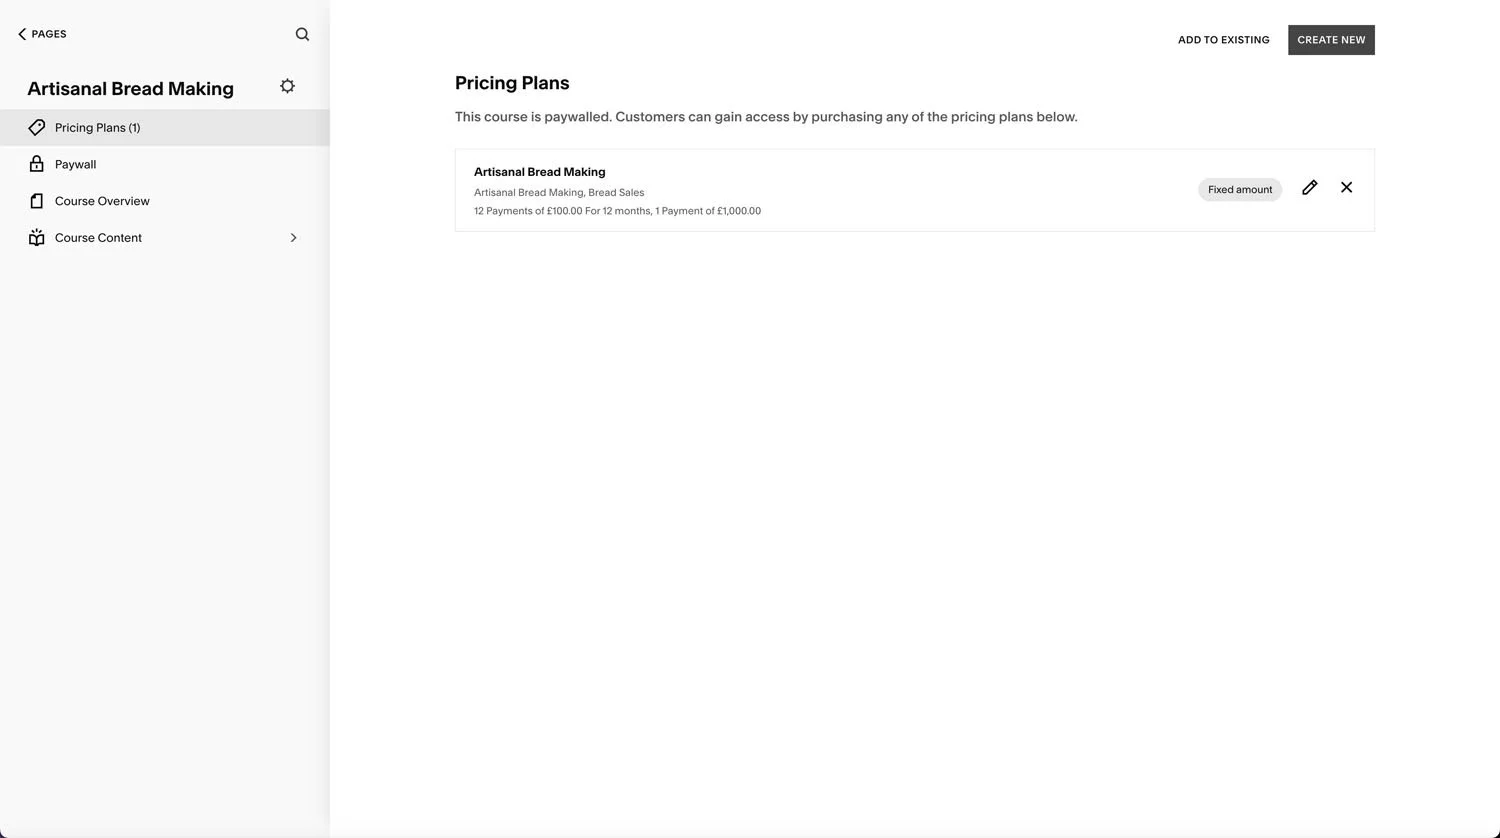
Setting up a pricing plan for your Squarespace course
Head to the pricing plan section under your course

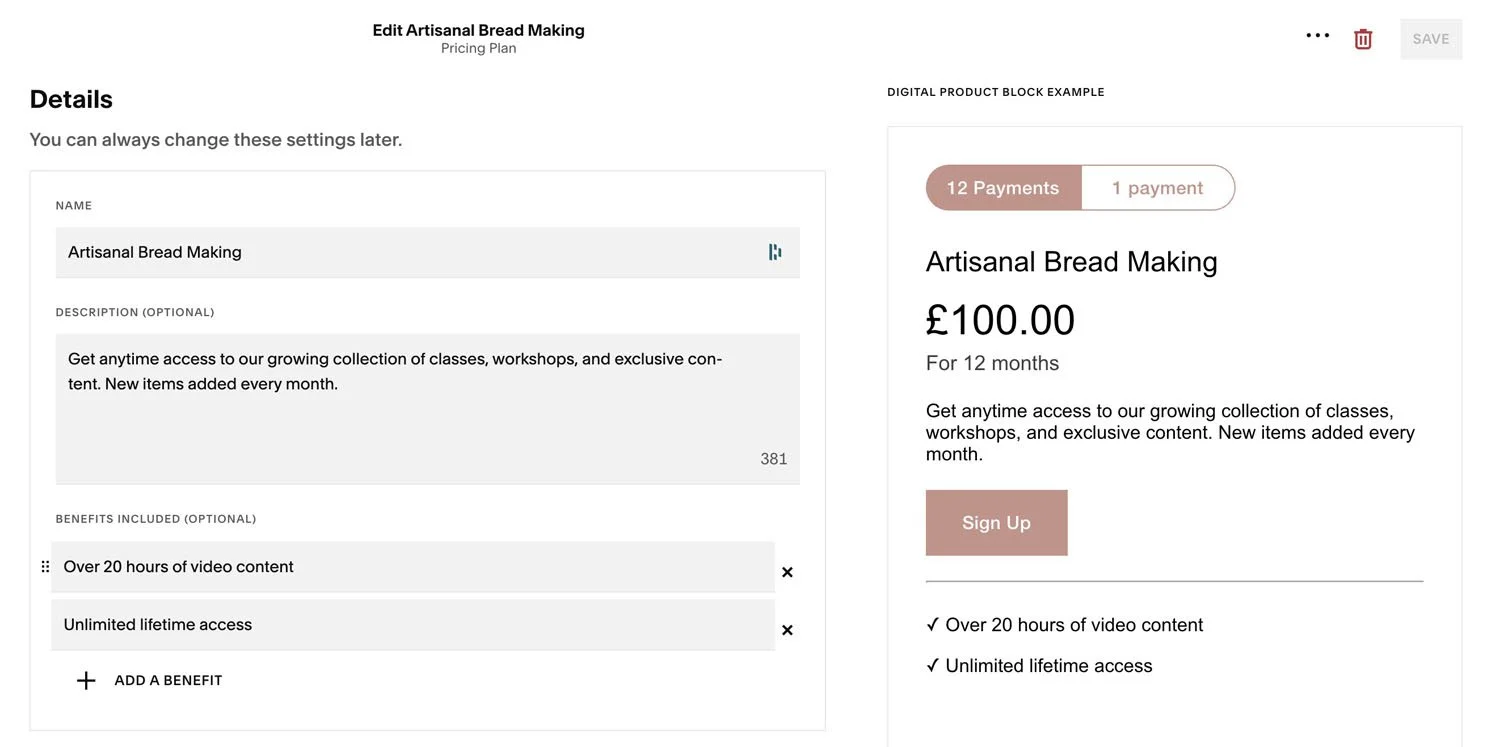
Here you can add some basic details which will show up in the “digital products” block which is where people will purchase your course from.

Next you’re going to actually set up your pricing plans.
So we can decide whether to charge one payment, multiple payments, a subscription or to set the course to be available for free?
One payment is pretty obvious, they pay one time to purchase access to the course.
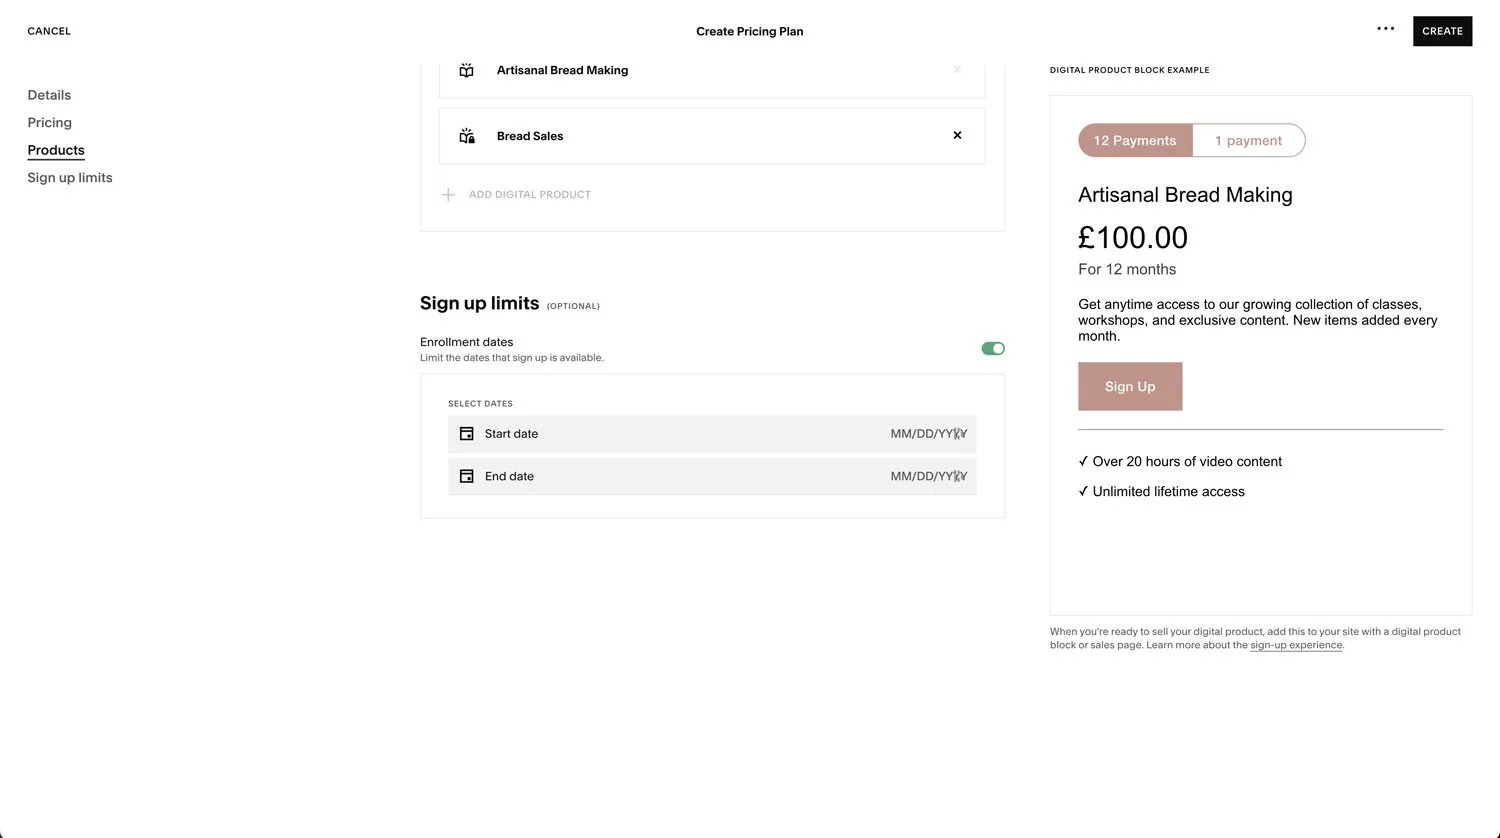
Now we also have the option for a payment plan.
So for example we could set the option for people to choose between a one time payment of $1000 or a payment plan of 12 x $100. In this case they have the choice to spread the course cost over a year, or to pay the whole thing up front.
It’s important to know that this is different to a subscription.
A subscription charges them for an unlimited amount of time until they decide to cancel. So maybe it would be $15, which repeats every month just to infinity until they decide, you know what, I no longer want this subscription.
So that's what's different between a payment plan and a subscription.
Now, the other thing that I love about what Squarespace did here was they have included products. So basically what this gives you the ability to do as a course creator is to create bundles or special promos.
So for example, when I run a course sale, for three days only I like to add on five extra bonuses, for example.
So what I can do back in my Squarespace panel is I can create more digital products and I can go and click to add those digital products. So I'm gonna go into pricing plans, then I'm gonna go into edit. And then when I come down here I can click the plus button and I can select from the other digital products on my website.

So there we are. You could add multiple different digital products to creat irresistable bundles for your audience!
Then let's go to sign-up limits.
This is optional. However, as a course creator, it's very common to do have limited windows whereby people can enroll in your course. So we're going to enable that. And let's maybe set it up that we want our enrollment to go for one week straight.
We would then have the ability to have someone only able to purchase and enroll during the set dates.
We also have the option to make multiple different pricing plans for any given product.
And the reason that this is important is because say, for example, for two days only, you do the bread-making course plus five bonuses, but then I don't know, you want to create a new bunch of bonuses and you want to do 10 bonuses next time, for example.
So we could create a new pricing plan and we would do bread bread-making course plus 10 bonuses (wahoo!)
To do this just click the create new button and follow the steps.
Now, of course, when it comes to deciding what to price your course at and try to figure out, if it's going to take me, three months to build this online course, and I'm going to lose out on a bunch of, client revenue in those three months, you really need to figure out, does my course actually have the potential to sell?
And lucky for you, I created a quiz to help you answer the question - does my course have six-figure potential. Grab it below!
How to set up a sales page for your Squarespace course
Okay, next, speaking of sales, let's talk about sales pages. Okay, so down here in the not linked section, we are going to create a new page and this is going to be our sales page.
Note that it's not sort of living within the section of the course, it's actually separate! That’s important to know.
So we're gonna go to the plus button in either the not linked, or main navigation section to add a sales page.

So as normal, you’re gonna click the plus button, then go to page layouts because they've just added something lovely and that is a digital product sort of demo page, which this just is sort of like a starter for a sales page pretty much!
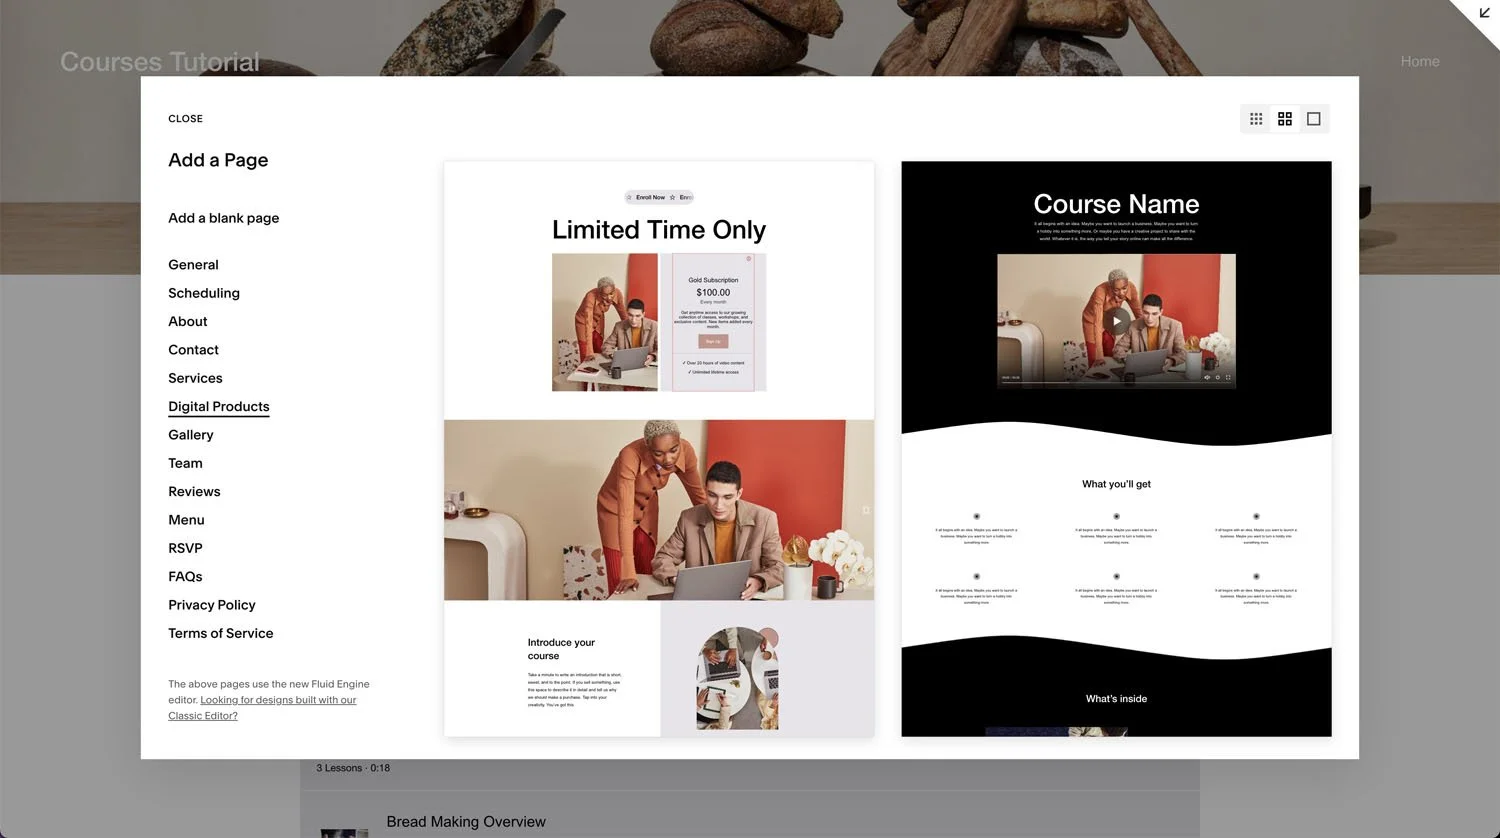
And the thing that you will notice here is that we have a digital product block embedded in the page already. Now this is new with the courses feature and it's really key because this is the aspect that will link up your course to the actual checkout, to the actual getting into the course content aspect.

So if we click on our digital product block and click on edit, we then need to choose a pricing plan that relates to the product you’d like to sell from this page. Here we will now see the different pricing plans that I had just created.
So basically I'm linking this digital product block to the digital product within Squarespace and telling it like, hey, if they click on sign up, get them to buy this specific digital product. So make sure to choose the right one here!

If you want to add more information or change information in this block, you’ll need to head back into your product itself, and the attached pricing plans and amend the info there.
You do have some options within the digital product block in terms of design, so we can actually turn on and off different elements here (as I mentioned though, to edit the actual content you’ll need to go back to the product itself).
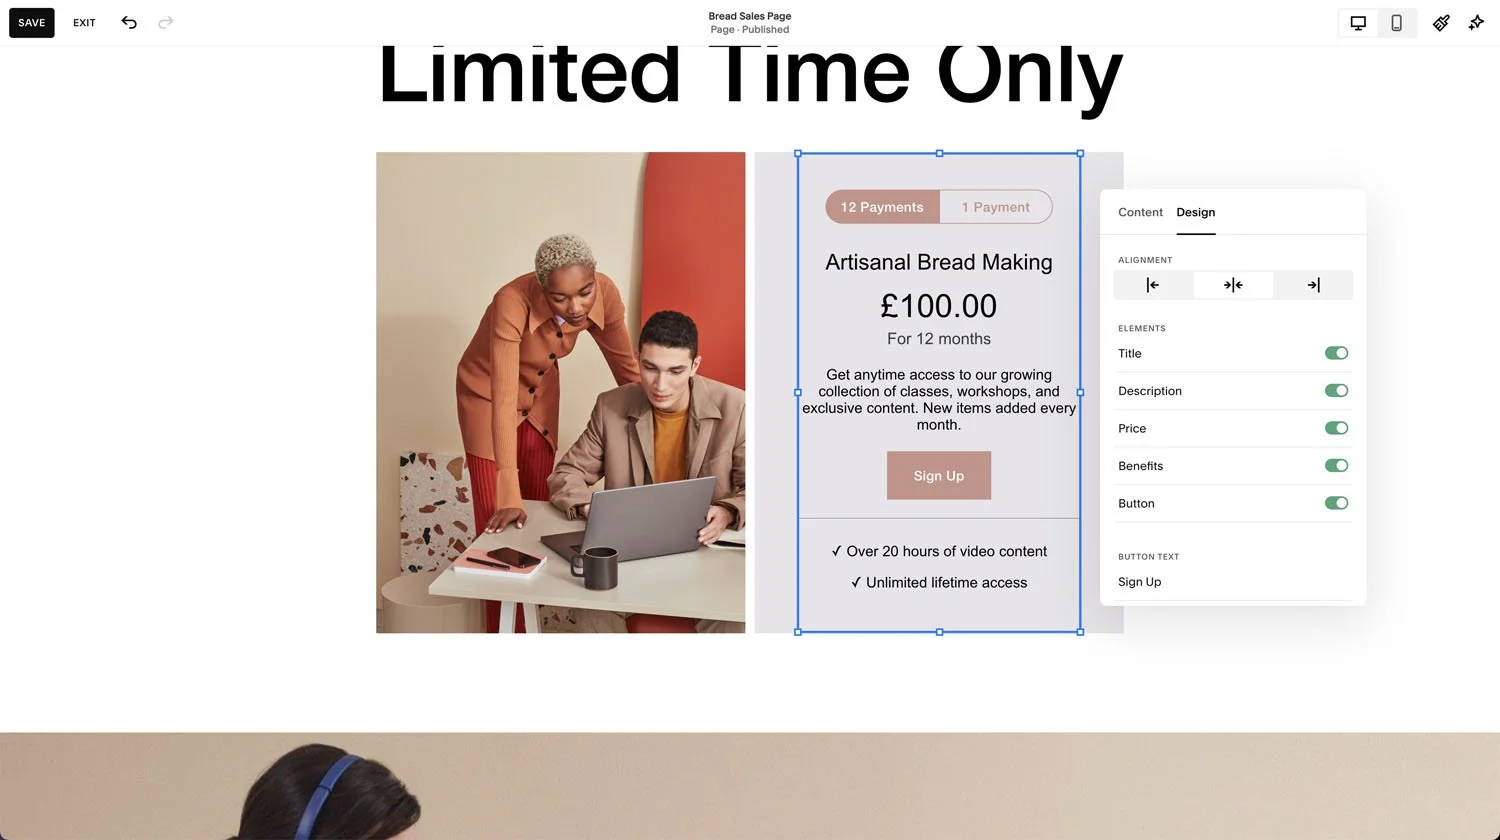
So say if we don't want that list of benefits to appear, we can toggle that section off and it will disappear.
Connecting a payment processor to your Squarespace account.
Now, in order to get your course to actually sell, the first thing that you need to do is you need to connect your Stripe, Paypal or Square account.
So let me go into these settings.
If you're unfamiliar with Stripe, it's basically like the payment processor of the internet. It's the thing that takes the money from your clients or student's bank account and then puts it into your Stripe account and then sends it to your business bank account.
If you do forward slash on your keyboard from anywhere in the Squarespace site, you don't need to command anything, just the forward slash, you can type to find something.
So I know I need the Stripe settings, so I type Stripe (or Paypal or Square) and it’ll find the place on Squarespace where I can connect my account (just follow the step by step & you’ll be allll good!)
You can (for the moment at least!) also find this in the commerce settings section under “Store payments”)

So there you have it - your new course is up on Squarespace!
Now as I mentioned, this is a brand-new feature of Squarespace. They will be building this out to be super robust in the future. I already had some insights into what they're working on for the courses feature, so it is a beautiful starting point, but I do want you to know that there's lots more to come on this one, which is very exciting - so keep an eye out & happy course creating!!